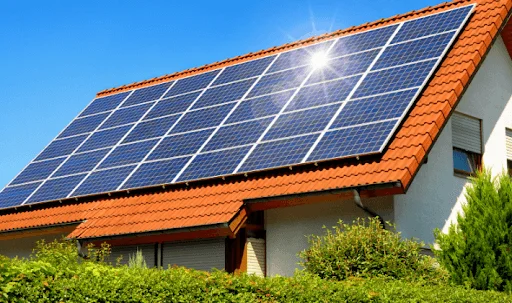
Solar panel installation is a smart investment that offers long-term savings, increases property value, and helps the environment by reducing carbon emissions. However, the process of installing solar panels can seem daunting, especially if you’re new to renewable energy. This guide provides a clear, step-by-step process on how to install solar panels in your home Solar panel installation in USa or business in the usa. Whether you’re considering a DIY approach or hiring a professional installer, understanding the installation process is key to making the transition to solar power seamlessly.
- Assess Your energy Needs and Solar Potential
The first step in installing solar panels is assessing your energy needs and evaluating whether your property is a good candidate for solar power. Start by reviewing your utility bills from the past 12 months to determine your average energy consumption. This will help you estimate how many solar panels you’ll need to meet your energy demand. Keep in mind that a typical solar panel can produce between 250 and 400 watts per panel, depending on the panel type and efficiency.
Next, assess your property’s solar potential. Factors such as roof size, orientation, and shading from trees or nearby buildings play a significant role in how much sunlight your panels will receive. A south-facing roof without much shading is typically ideal for solar panel installation, as it receives the most sunlight throughout the day. If your roof isn’t ideal, consider ground-mounted solar systems or even solar panels integrated into other structures, such as carports. You may want to hire a professional to conduct a site evaluation to ensure your home or business is suitable for solar.
- Research Local Incentives and Financing Options
Solar panel installation is an investment, and while the cost of solar has dropped significantly over the years, it can still be expensive upfront. Fortunately, there are several financial incentives and financing options that can help reduce the cost of installation. The Federal Solar Investment Tax Credit (ITC) allows homeowners to deduct up to 30% of the cost of the solar system from their federal taxes. Many states also offer additional rebates, grants, or tax credits, which can further reduce the upfront costs.
Beyond government incentives, you can explore different financing options such as solar loans, leases, or power purchase agreements (PPAs). Solar loans allow you to spread out the cost of installation over several years, while leases and PPAs enable you to install solar panels with little to no upfront cost, but you’ll pay a monthly fee for the power they generate. Be sure to compare these options and determine which one best fits your financial situation before moving forward with your installation.
- Find a Reputable Solar Installer (or DIY Option)
Once you’ve assessed your energy needs and secured financing, it’s time to choose an installer. While some homeowners may opt for a DIY solar panel installation, it’s often recommended to hire a professional solar installer due to the complexity and safety considerations of the process. A professional installer will be able to evaluate your home’s specific needs, design a custom system, and ensure all electrical and structural requirements are met.
When selecting a solar installer, make sure to check their credentials and certifications. Look for installers with NABCEP (North American Board of Certified Energy Practitioners) certification, which ensures they have the knowledge and expertise to install solar panels safely and effectively. Additionally, check for customer reviews, insurance coverage, and warranties offered on both the solar system and installation services. A good installer will provide you with a detailed proposal, including a system design, timeline, and cost estimate.
- System Design and Permitting
After choosing an installer, the next step is system design. The installer will design a solar system based on your energy needs, roof size, and any local building codes or regulations. They will determine the number of panels you need, the type of panels (e. g., monocrystalline, polycrystalline, or thin-film), and where they should be placed on your roof for optimal energy production.
Before installation begins, the installer will obtain the necessary permits. In the usa, every state, county, and municipality has different regulations regarding solar installations, so it’s essential to ensure all permits are in place. These permits typically include electrical permits, building permits, and zoning approvals. The installer will handle this process, but you may need to wait for approval before installation can begin. It’s important to factor in this time, as permitting can take anywhere from a few days to a few weeks, depending on the location.
- Installation of Solar panels
Once all the necessary permits are in place, the installation process can begin. On installation day, the crew will start by setting up scaffolding or safety barriers around your home to protect themselves and the surrounding area. They will then mount the solar racking system (the structure that holds the panels in place) on your roof or ground system. The racking must be securely attached to your roof or ground and aligned correctly to ensure optimal panel performance.
Next, the installer will mount the solar panels onto the racking system. The panels are connected to each other using wiring and electrical components, and the system is then linked to an inverter, which converts the direct current (DC) electricity generated by the panels into alternating current (AC) electricity used by most household appliances. Depending on your system, additional components like batteries may be installed to store excess energy for later use.
Once everything is installed and connected, the system will undergo a series of tests to ensure it’s working properly. This may include checking for proper voltage, ensuring the inverter is operating correctly, and making sure the electrical connections are safe and secure.
- Inspection and System Activation
After installation, your solar system will need to be inspected by a local authority or utility company to ensure it meets building codes and safety regulations. The inspection is a necessary step before the system can be turned on and connected to the grid. In most cases, your installer will schedule this inspection on your behalf, but you may need to coordinate with the local authorities.
Once the system passes inspection, it will be activated, and your utility company will approve the grid connection (if applicable). At this point, your solar power system will be fully functional, and you can start generating clean, renewable energy for your home or business. If you’re using a battery system, you can also begin storing excess energy for use later on. Your installer may provide you with access to an online monitoring system that allows you to track your energy production and consumption in real time.
Conclusion
Installing solar panels in your home or business is an excellent way to reduce energy costs, increase property value, and contribute to a more sustainable future. The process may seem complex, but by following these six steps—assessing your energy needs, securing financing, finding a reputable installer, designing the system, installing the panels, and completing inspections—you can make the transition to solar power smoothly. With continuous advancements in solar technology and increasing incentives, now is an excellent time to consider installing solar panels in your home or business in the usa.
You said: